8 min read

How to Find Good Places to Stargaze

Are you feeling wistful for star-streaked views of the night sky? Hoping to get the most out of a meteor shower? Or perhaps you live in a large city and you've never even seen the Milky Way?

If you're hoping to do some skywatching, but you're not quite sure how to find a great spot, we have you covered. Here are some key things to know about how to find the best places for stargazing.

A darker sky means more stars

To begin with, you need dark skies away from city lights to see more stars. This is especially true if you want to be able to see the Milky Way. There are many more faint stars in the sky than bright ones, and only the brightest stars and planets are brilliant enough to see in bright, urban skies.

The reason for this is light pollution – stray light from urban areas scattered into the night sky. Light pollution is stray light from parking lots, sport complexes, street lights, and other human activity. It's a combined effect of scattered light from these things that manifests as a glow in the night sky. The larger and more developed a city is, the more light pollution it tends to produce.

Map of Southern California light pollution
Cities produce huge amounts of stray light, called light pollution, that scatters into the sky. This NASA map of Southern California shows night lights from Los Angeles and other nearby cities. The location of the image below is indicated by a red dot. (Full map)
NASA's Earth Observatory

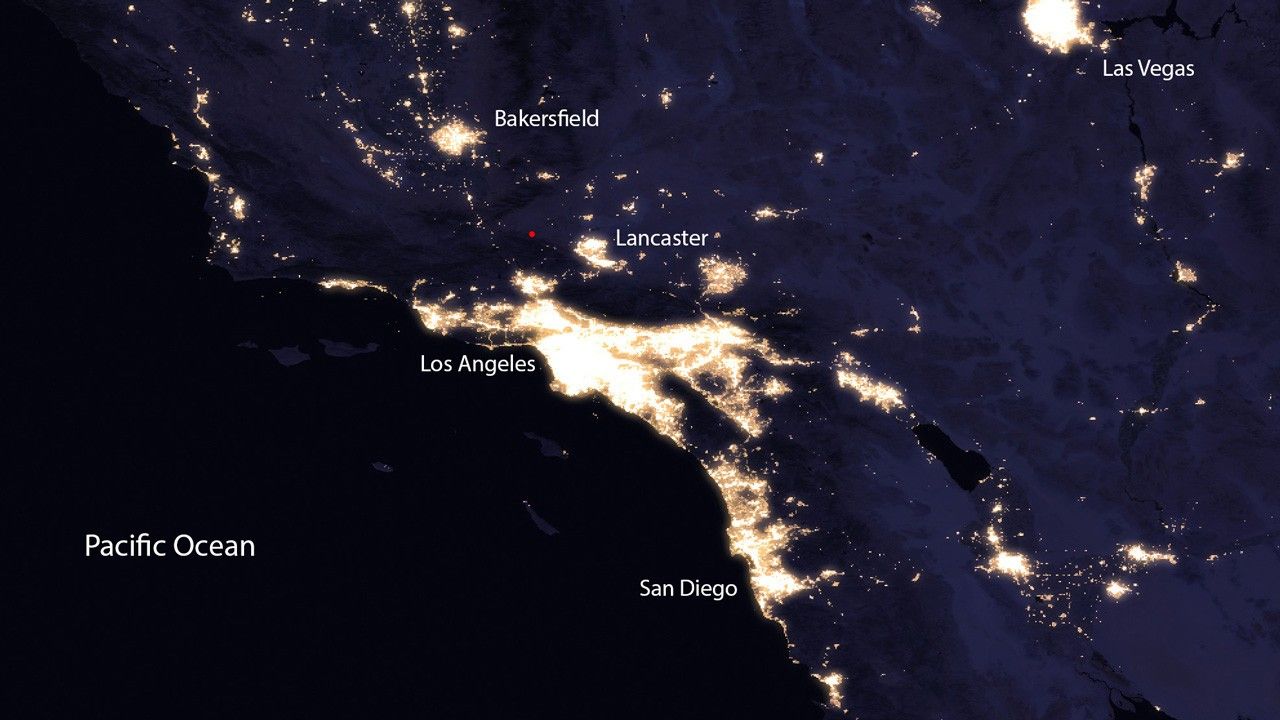
For observing faint stars and meteors, the darker the sky, the better. The amount of skyglow from light pollution diminishes as you venture farther outward from a population center. So heading outward from town, at least 20 to 30 miles from the city limits, is key.

Photo of the Milky Way with skyglow on the horizon
This photo of the Milky Way was taken at a relatively dark Southern California location (approximately Bortle class 4.5) in which the nearest city, Lancaster, was about 20 miles away. You can see skyglow from the city on the horizon, but the Milky Way was clearly visible to the eye.
NASA/Preston Dyches

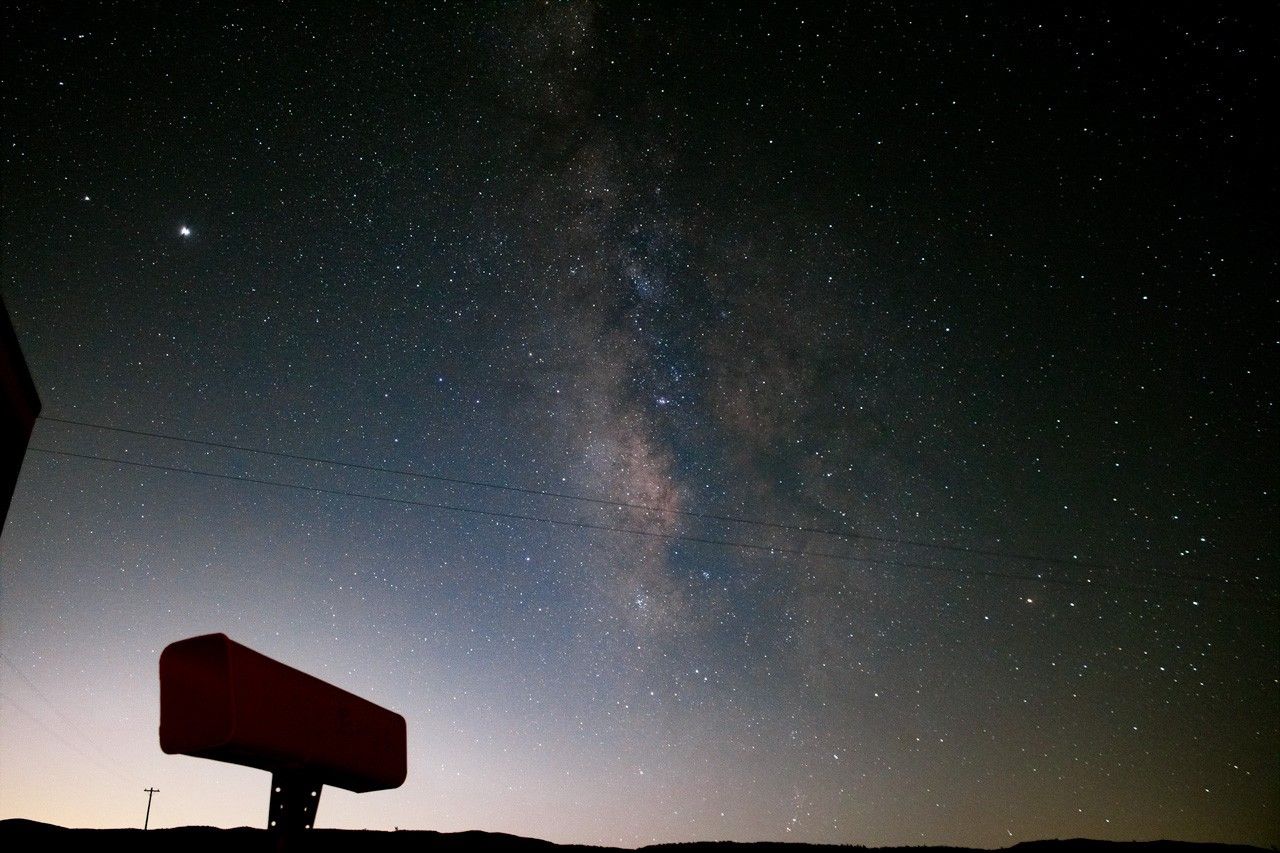
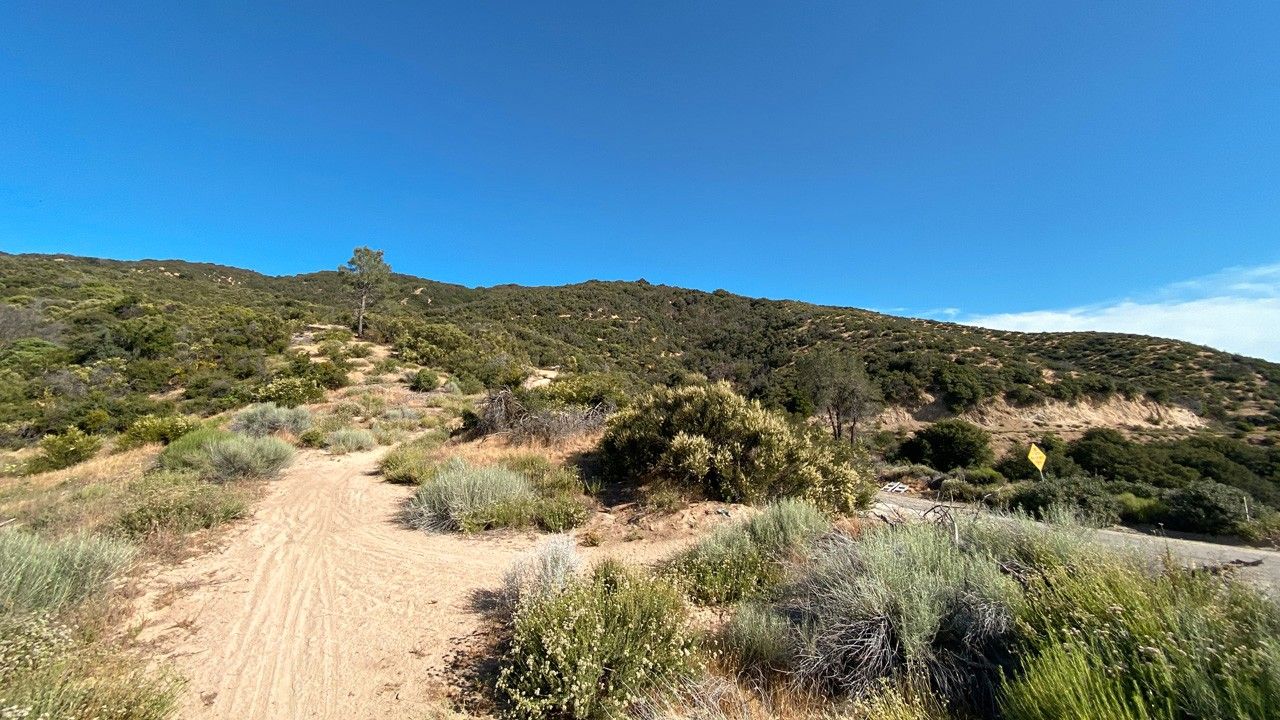
If you live near mountains, they can help to block light. Putting a ridge of mountains between you and the city can make a big difference. An alternative is get to the other side of a large wilderness area or body of water. Depending on how far outside of town you venture, you'll likely still see a glow on the horizon in the direction of the city.

Graphic of the Bortle scale showing different amounts of light pollution
The Bortle scale helps amateur astronomers and stargazers to know how much light pollution is in the sky where they observe.
International Dark Sky Association

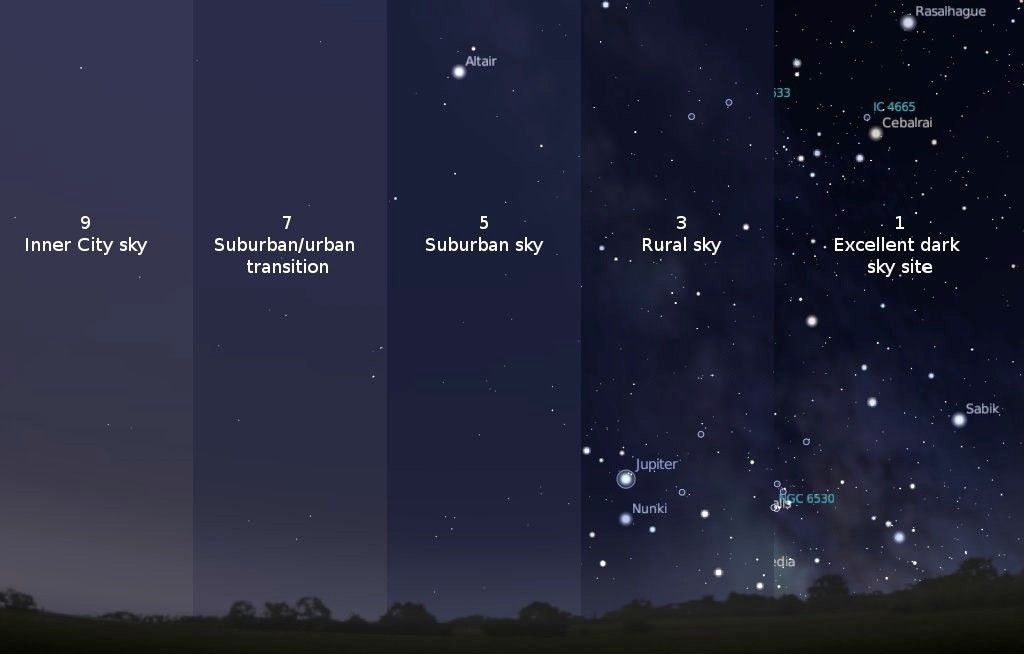
There's a numeric scale, called the Bortle scale, to help would-be stargazers know how bright the sky is likely to be above a given location. It has nine levels, from class 1, which is the darkest sky you can find on Earth, to class 9, which is the most light-polluted city sky. You'll only see the brightest stars and planets amid the glow of a Bortle-class-9 sky. For most of us, getting to a Bortle-class 3 or 4 location is dark enough for a great evening of stargazing. To get to darker sites generally requires long drives to remote spots, but it can be worth it! There are a variety of websites and apps that provide maps of light pollution and Bortle ratings.

What kinds of areas have better dark sky conditions?

Getting farther way from population centers is key, but there are some other factors that can enhance your stargazing. Being at higher altitude helps, because you'll be above the dense air at low altitudes that contains hazes, fog, and smoke that mask your view of the stars. If you can safely get to a viewing location a couple thousand feet above the surrounding area, it can make for clearer skies.

You don't have to find locations super far from roads or highways, either. As long as there aren't lots of bright lights nearby, you can find decent spots quite close to well-traveled highways. This is because light pollution is a cumulative effect, so it's worse the closer you are to more developed areas.

It also matters which direction you observe. You might have a dome of light pollution from a city 30 to 50 miles away on one horizon, but spin around the opposite direction and you could find a much darker sky. You also might find a great spot for stargazing under a moderately dark sky, with a view that looks toward an area under a significantly darker sky. An example is a mountain campground under Bortle class 4 sky, with great views in the direction of a Bortle class 3 sky over the ocean.

Let's say you want to observe Milky Way, and the stargazing app on your mobile device tells you it will be rising in the southeast early in the evening. Thus, you'll find the best visibility by going to a location where there's no large city center between you and the southeastern horizon.

You'll also want to check the weather for the area you're considering, because even the best spots are too cloudy sometimes. Other factors to check include winds, temperatures, and even smoke from wildfires. All of these can potentially affect your seeing conditions as well as your stargazing experience.

The phase of the Moon matters

Don't ignore the Moon. Take a look at what the current Moon phase is, and note when it rises and sets at your observing location. (There are lots of websites and apps that provide this info.)

For those hoping to observe meteor showers or the Milky Way, a bright Moon can be the thing that causes you to stay home on a given night. When it's close to full – for the week or so before and after the full moon phase – the Moon is quite bright, and creates a lot of skyglow. This has a similar effect to that of human-created light pollution, as it makes faint stars and other faint objects in the sky harder to see.

The best time to observe the stars, with regard to the Moon's brightness, is the two weeks before and after the new moon phase. On these evenings the Moon is either absent from the sky all night, or sets within a couple of hours after sunset, or doesn't rise until the pre-dawn hours.

Some landscapes are better than others

The next factor to consider in choosing a stargazing spot is the landscape itself. A dark sky far from city lights, with no bright Moon, is great. But if you're deep in a canyon or a dense forest, it's kind of hard to get those sweeping views of the night sky you're seeking.

Try to find a location where there are open views all around, or at least clear views in the direction of things you're hoping to observe. For example, the bright core of the Milky Way is generally seen toward the south, so make sure there isn't a tall mountain ridge blocking your view. If you're observing from a forested area, try to pick a spot near a lake shore or meadow, or some other type of clearing. That way, you can step into an open viewing area once it gets dark.

And hopefully this goes without saying, but make sure the location you've chosen is somewhere you're actually allowed to be at night! You'll want to avoid venturing, even accidentally, onto private land, and be aware of rules and hours of access, even if you're heading for public land.

Photo of a desert-like landscape during the day
Try to scout your stargazing location during the day, so you can be sure to find a spot with a great view that is safely away from the road, and so that you'll be aware of any hazards that might trip you up in the dark.
NASA/Preston Dyches

When you get there

If you're successful in finding a nice spot where it gets super dark at night, it's still a good idea to scout the location during the day. If you haven't been there before, try to arrive prior to sunset. Beware of hazards that might affect your safety, and be sure that you and your vehicle are a safe distance off the roadway. Remember that rocks, shrubs, and fallen branches create tripping hazards in the dark. And you'll want to be careful around hillsides and other steep drop-offs.

Also be safe with regard to any wildlife that could be in the area. Be alert for animals like cattle, deer, or rabbits in the road as you drive on dark highways. At your viewing site, be careful where you step in case there are snakes, and be mindful of how to be safe in places where there might be bears or other wildlife.

Finally, allow time for your eyes to become dark adapted. It can take half an hour or more for your vision to become fully sensitive to the low-light environment. Be especially careful about stumbling around in the dark when you first arrive, or after you turn on a light, even briefly. Protect your night vision by minimizing the use of bright mobile devices and flashlights, and use only ultra-dim light sources if you can. The best lights for stargazing are red lamps and red LEDs, because red light has the smallest impact on your night vision. A headlamp with a red LED is an ideal choice for helping you find you way during a night out under the stars.

Here's wishing you clear skies...